Creating a corpus
In order to create a new corpus, select “New corpus” from the main menu.

Now, enter the name and description of your corpus (6) and choose the language of the corpus (7).
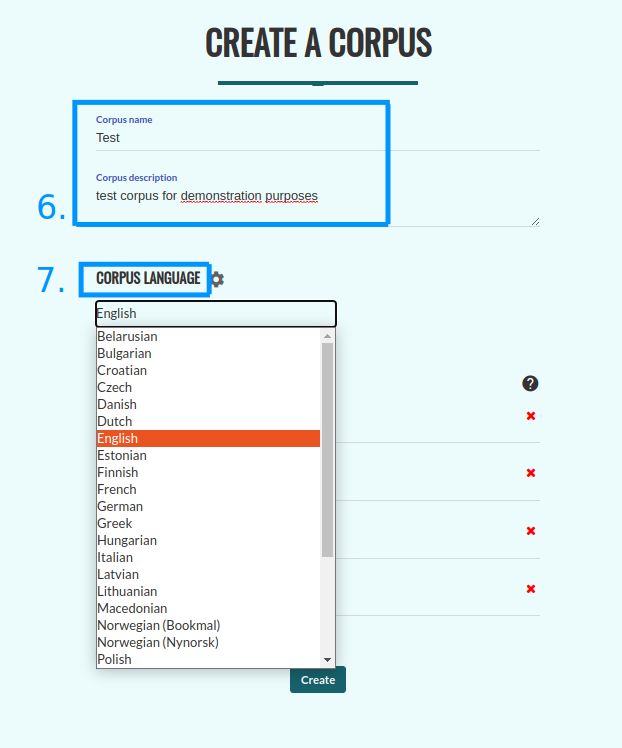
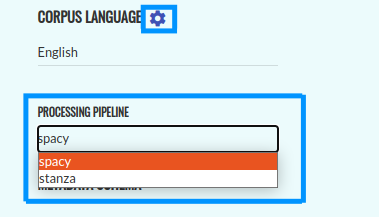
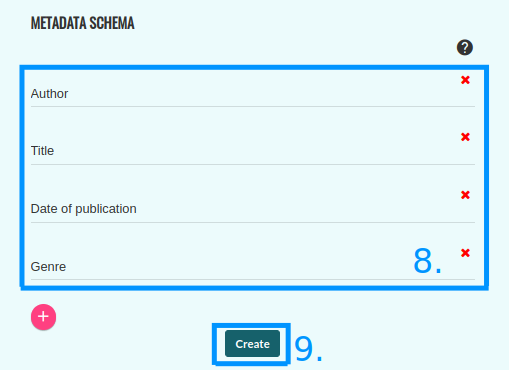
In order to select the processing pipeline, click on the settings icon next to (7). If both pipelines are available for your corpus, the default setting is Spacy. You can add metadata of every text in your corpus (8). You can also modify them once the corpus is created. To save your corpus, click on the “Create” button (9).
Next, you will be redirected to the control panel for your corpus. Once its status switches to “Ready” (10), you can start adding texts by pressing the “+” button (11).

When you click on the “+” button, you will be redirected to the page which will allow you to add your texts. The list of supported formats is available here. There are two ways of adding new texts to a corpus.
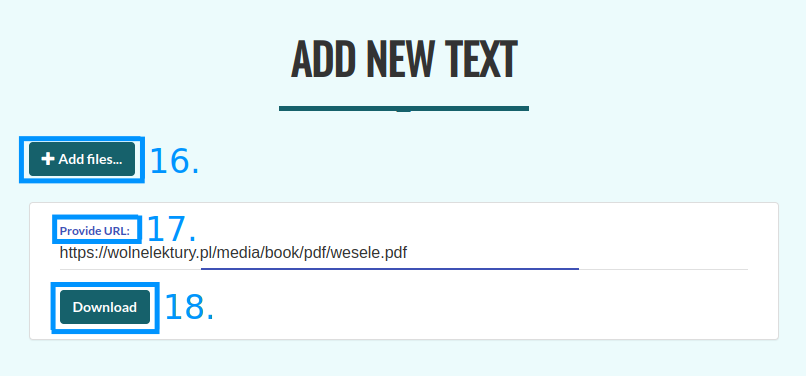
One approach is to upload files from your local drive. In order to do that, you need to press the “+ Add files” button (16) and choose one or more files from the pop-up window. The other approach consists in providing links to the texts that are supposed to make up your corpus in the appropriate window (17), and clicking on the “Download” button (18). Korpusomat will download and process them automatically.
Po załadowaniu treści można wprowadzić lub zmodyfikować metadane (19). Korpusomat automatycznie spróbuje wydobyć metadane z dodanego pliku, jednak nie zawsze jest to możliwe. W wypadku tekstów w formatach EPUB i MOBI oraz stron internetowych Korpusomat spróbuje wydobyć metadane z nagłówków dokumentów. W wypadku plików tekstowych automatyczne rozpoznawanie metadanych wymaga tego, by nazwy plików zapisane były w następującym formacie: „autor - tytuł (miejsce, rok)”. Przykładowo, aby Korpusomat automatycznie rozpoznał metadane „Pana Tadeusza” z nazwy pliku, dodany plik powinien nazywać się „Adam Mickiewicz - Pan Tadeusz (Paryż, 1834).txt”.
To add more texts, press the “+ Add files” button again (16) or copy and paste another link in the search bar (17).
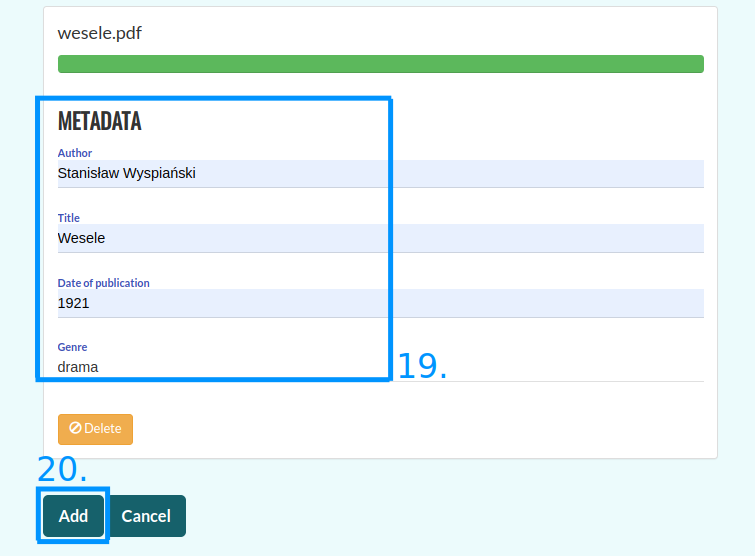
Press the “Add” button to finish adding texts to your corpus (20).
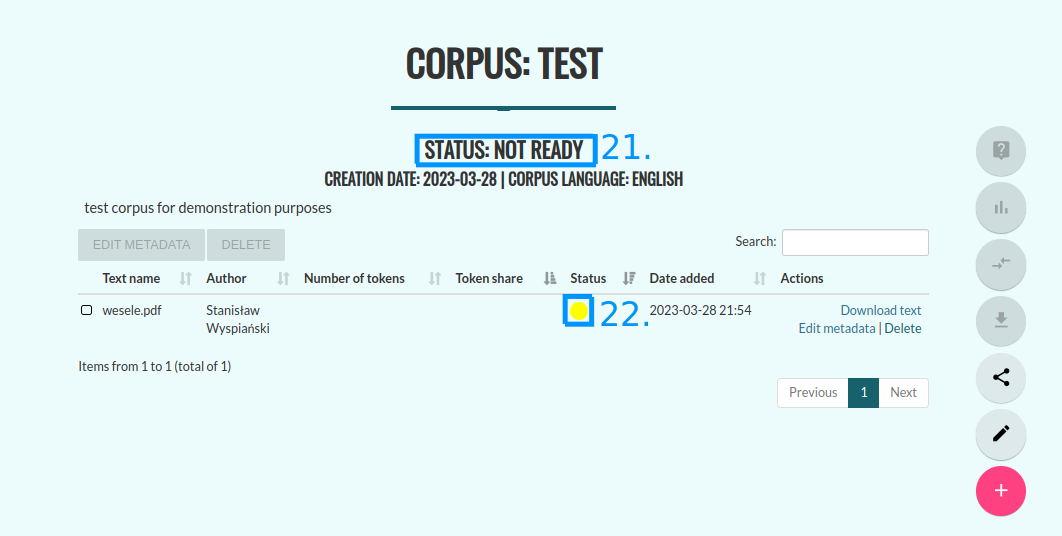
You will then be redirected back to the corpus control panel, while Korpusomat processes the added texts. You will be able to verify the status of each text, such as “In processing” (22). To process a book consisting of 80-100 thousand words, Korpusomat will need approximately 4-5 minutes, although the exact processing time depends on the server load and the selected layers of annotation. Currently, the maximum processing time of one file is 10 minutes - longer tasks will fail. While your texts are being processed, you can add new files using the “+” button (11).
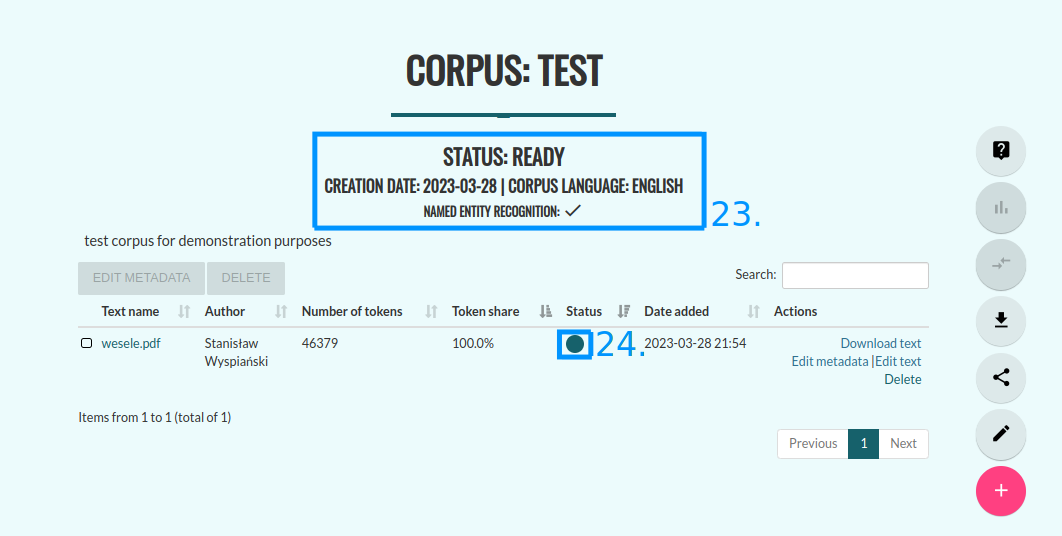
Once your texts are processed, their status will change to “Processed correctly”. The status of the corpus will also then switch to “Ready” (23).
Now you can start working with your corpus. The potential next steps are:
Editing the corpus (12)
Sharing the corpus with other users (13)
Downloading the processed XML files (14)
Querying the corpus (15)
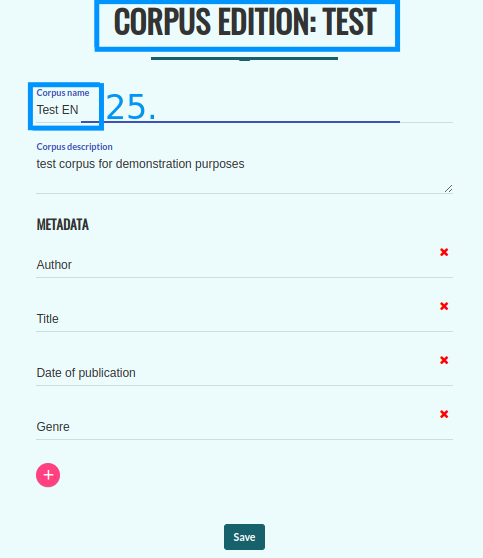
You can edit the name and description of your corpus, add and edit metadata (25) by pressing the pencil icon (12).
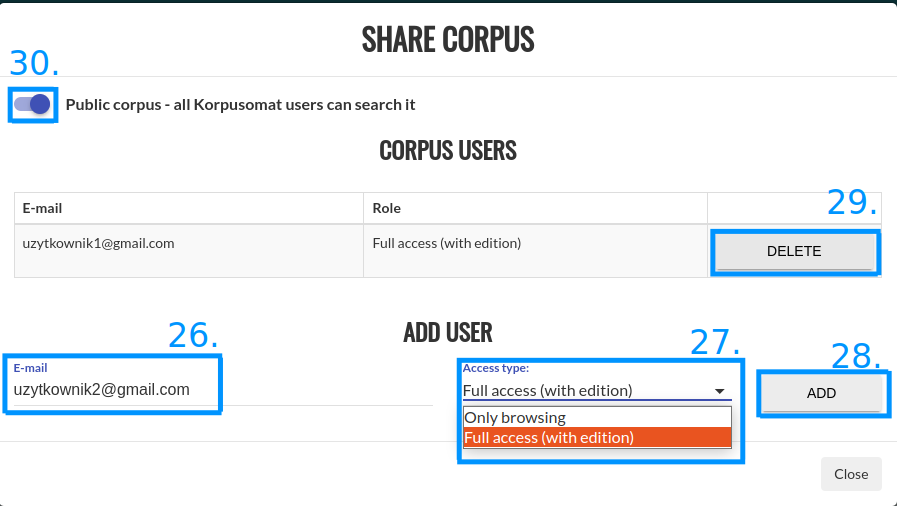
You can share your corpus with other users by pressing the “Share corpus” button (13). You just need to enter their email address(es) (26), choose the access type (27), and press “Add” (28). You can also remove their access to your corpus using the “Delete” button (29). In order to share the corpus with all Korpusomat users, swipe the “Public corpus” button to the right (30).
You can download the processed XML files of all the texts in the corpus by clicking on the “Download corpus files” button (14). The format of the files will be in line with the following specification CCL.
You can continue to edit your corpus. Adding or removing texts will require the corpus to be processed again.
Clicking on the question mark icon (15) will redirect you to the search screen. The following sections of this guide explain how to create corpus queries.